I created the initial version of this game for my adult boot campers many years ago, and have since adapted it several times to work for my various children’s programs. (The adult version was a big hit and tons of fun, but I’ll save that for another post!)
I like this game for a few reasons. First, it requires strategy in addition to the physical component so it keeps kids engaged throughout the entire game. And secondly, (but a big one!) as a facilitator it is relatively easy to keep things under control and orderly.
Another big plus is that it can be modified to work for both indoors and outdoors, all age groups, and numbers of players. This particular version is one I’ve used for classes in the age ranges of 5-7 and usually about 12 kids per class, but it can be modified for even a few kids.
What you’ll need
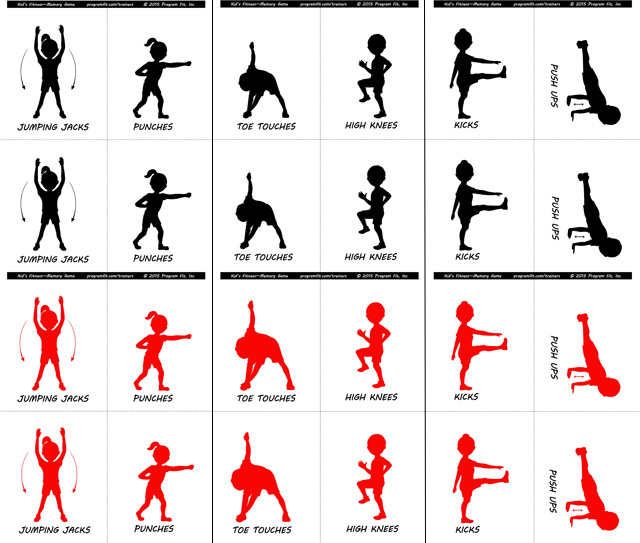
A. Printed cards depicting 2 sets of 6 exercises in 2 different colors (you’ll end up with a total of 24.) The cards pictured below are the ones I use most often for this age group. If you want to save yourself some time, feel free to print these for your own use.
Get a free download of the below cards here!
B. A way to “house” the cards (see notes below for examples.)
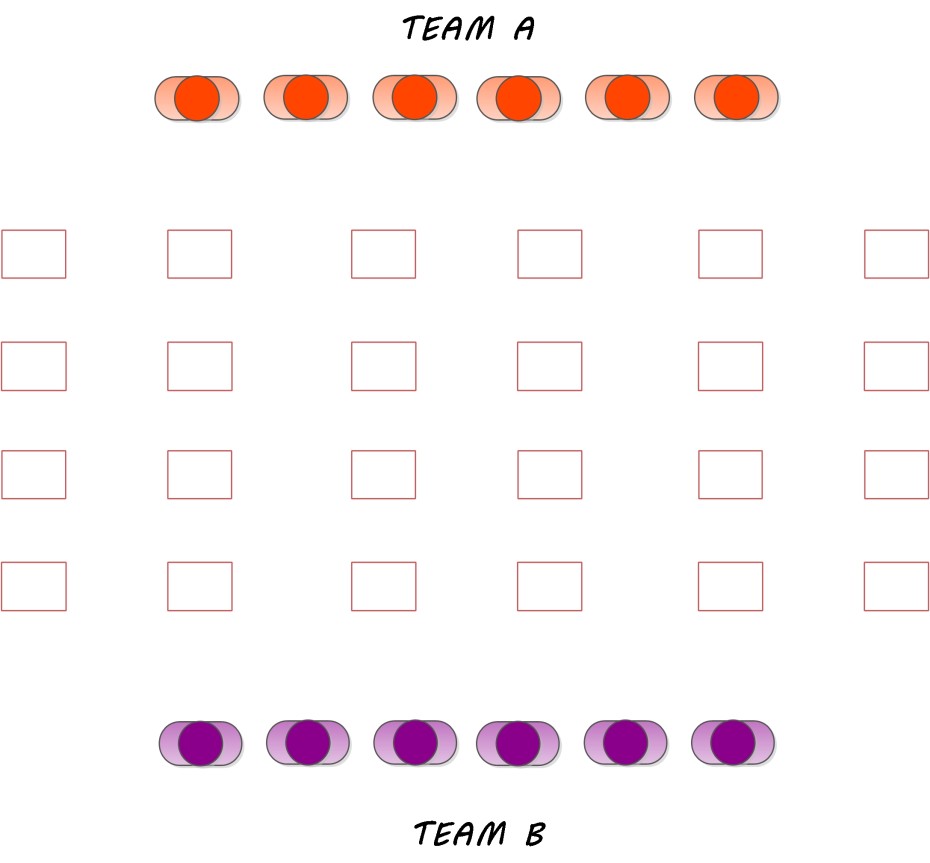
Set up: (see diagram A below)
- “Shuffle” cards so they are not in order and place them face down in 6 rows of 4. Ideally with enough space to walk in between each row comfortably.
- Divide group into 2 teams and have them sit on opposing sides of the cards.

How to play:
- A representative from Team A (Person A) walks out onto the game floor and turns over any random card, then reads it aloud so everyone from both teams can hear. (Include the color on the card as well. For example, “Kicks, Red.”)
- Person A then leads (you might need to help, depending on the ages) both teams in completing 10 reps of whatever exercise is on the card. In this case, everyone on both teams will stand up and do 10 kicks, then sit down.
- Person A then places the card down face up and walks to another random card, turns it over and reads it aloud.
- If the second card matches the first (same exercise AND color,) then Person A collects both and returns them to his team. Because Team A got a match, they get to play again by sending another representative out to begin the entire process again, until the cards do not match.
- If the second card does not match the first (for example, “Push ups, Black”,) Person A leads both teams in completing 10 push ups. Person A then turns both cards back over so they are facing down and in the same exact spot as where they started, and then returns to his team. It is now Team B’s turn, and someone from that team begins the same process from the beginning.
- The game continues until every pair is collected and no cards remain. The team that has the most pairs of cards at the end is the winner.
Notes:
- Red cards need to match red cards and black cards need to match black cards. A “red punches” card does not match a “black punches” card.
- You can make the game easier for younger ages by using 24 cards of a single color.
- You can make the game more challenging for older players by printing the cards in 3 or 4 different colors, which would result in a playing field of either 36 or 48 total cards.
- When making your own cards, keep a few things in mind. If you have young kids, I’d suggest a simple picture along with a one or two word description. That way kids that can’t read can still understand and participate. I’d also suggest sticking to no more than 6 types of exercises. I’ve found, as a general rule, any more than that and the kids get overwhelmed by trying to decipher the pictures and remember how to complete each exercise, rather than focusing on the placement of the cards (the objective of the game!)
- You can also vary the reps of each exercise. Again, from past experience, I’ve found 10 to be the magic number for young kids. It’s also a big enough bite so kids get the physical jolt from it, but it also keeps the game moving at a nice pace.
Preparing the cards:
This will take a bit of time initially, but if you do it right, they’ll last a while and you’ll be able to reuse for several seasons. 
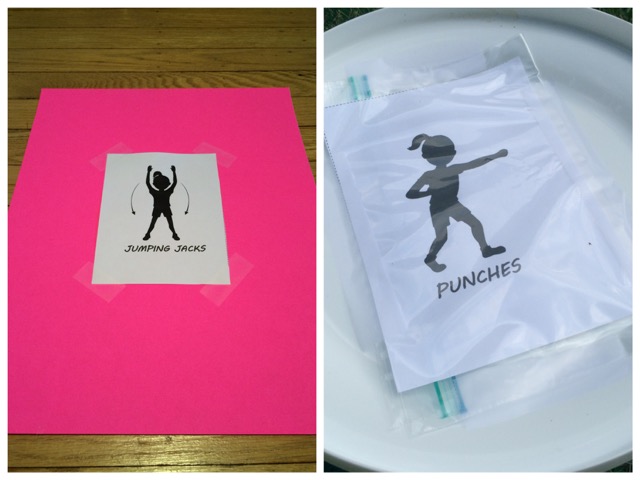
- Indoor play (photo on left:) The cards need to be heavy enough that they stay in place and don’t blow around when kids are jumping around near them. Tape or glue them to the back of heavy card stock, poster board, or paper plate.
- Outdoor play (photo on right:) Not only do you need to deal with wind, you need them to survive wet grass. A great solution I found was to invest in a set of blank flying discs. Of course, it costs a bit up front, but they are a versatile tool from which you can get a lot of future various uses. Then, print out the cards, put them in a plastic sandwich bag, and tape it securely to the underside of the disc. The disc provides the necessary weight and everything is water-resistant. If you can’t go the disc route, a less expensive way –though no less time consuming – would be to: a.) prepare the card the same way you would for indoor play (taping it to cardstock,) b.) put it inside a large plastic freezer bag c.) slide a magazine in behind it to provide weight necessary so the card doesn’t blow away (it doesn’t take long to accumulate 24 store catalogues in your recycling bin!) d.) put a blank of paper behind the magazine so all the bags look the same when they’re turned face down.
Hopefully this game works for you as well as it did for me. If you try it successfully, please share. And if you have any variations that worked well, please share!
